There’s something truly magical about biting into a salad bursting with vibrant colors and fresh, lively flavors – and green beans often play an unsung hero in this symphony of crunch and taste. But achieving that perfect balance of bright color and crisp texture? It’s an art form, one that begins with the simple yet transformative technique of blanching. In this guide, we’ll unravel the secrets behind blanching green beans to elevate your salads from ordinary to extraordinary, ensuring each bite delivers that sought-after snap and a freshness that sings. Get ready to discover how a quick dunk in boiling water followed by an icy plunge can turn humble green beans into a dazzling salad sensation.
Bright and Crisp: How to Blanch Green Beans for Salad Bliss begins by selecting the freshest green beans, a crucial first step in achieving that perfect crunch and vivid color that elevate any salad. When choosing green beans, seek pods that are firm, smooth, and vibrantly green without blemishes or brown spots. Slightly flexible but snap-able beans indicate optimal freshness, ensuring the texture and flavor shine through once blanched.
Prep and Cook Time
Preparation: 10 minutes Cook Time: 5 minutes Total Time: 15 minutes
Yield
Serves 4 as a side or salad base
Difficulty Level
Easy – perfect for cooks of all skill levels aiming for a bright, crisp green bean salad.
Ingredients
- 1 pound fresh green beans, trimmed
- 4 cups water
- 1 tablespoon kosher salt, for blanching water
- Ice water, enough to fill a large bowl
- 2 tablespoons extra virgin olive oil
- 1 teaspoon lemon zest
- 1 tablespoon fresh lemon juice
- 1 tablespoon toasted sliced almonds (optional, for garnish)
- Freshly ground black pepper, to taste
- Flaky sea salt, for finishing
Instructions
- Prepare the green beans: Rinse the green beans thoroughly then trim the ends, discarding the tips. Uniform length beans cook more evenly and look visually harmonious in your salad.
- Bring the water to a boil: In a large pot, combine 4 cups of water with 1 tablespoon kosher salt. The salting step seasons the beans internally and helps maintain vibrant color.
- Blanch the green beans: Add the beans to the boiling salted water. Cook uncovered until they turn bright green and just become tender-crisp, about 2 to 3 minutes. Test a bean by biting to ensure it is cooked yet still has a satisfying snap.
- Shock in ice water: Immediately transfer the beans with a slotted spoon to a large bowl filled with ice water. This cooling step halts the cooking process, locking in the vibrant color and crisp texture essential to a standout salad.
- Drain and dry: After 5 minutes in ice water, drain the beans thoroughly in a colander. Pat dry with a clean kitchen towel or salad spinner-excess moisture can water down the salad dressing.
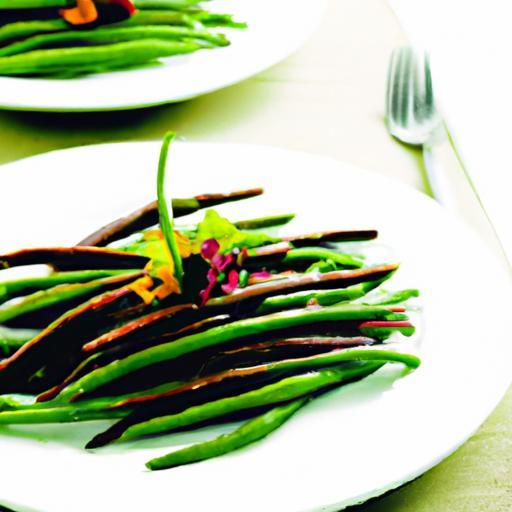
- Toss with flavor boosters: In a mixing bowl, combine the green beans with extra virgin olive oil, lemon zest, and lemon juice. Toss gently to coat, letting the bright citrus notes enhance the natural sweetness of the beans.
- Season and garnish: Finish with freshly ground black pepper, a sprinkle of flaky sea salt, and optional toasted sliced almonds for texture contrast and a nutty aroma.
Tips for Success: Elevate Your Green Bean Salad with Pro Techniques
- Purchase organic green beans for deeper flavor and peace of mind on pesticide residues.
- Use freshly squeezed lemon juice rather than bottled; the brightness makes a remarkable difference.
- Adjust blanch time based on bean thickness. Thicker beans may need an extra 30 seconds; thinner ones less-always taste test during cooking.
- For a variation, try adding finely minced garlic or shallots to the dressing, infusing the salad with gentle pungency.
- Make ahead tip: Blanched green beans can be stored, covered and chilled, for up to 24 hours. Toss with dressing just before serving to maintain freshness.
- Use a mesh strainer or slotted spoon to transfer beans during blanching to avoid overcooking or breakage.
Serving Suggestions
Bright and Crisp: How to Blanch Green Beans for Salad Bliss pairs beautifully with grilled chicken or a chilled white wine. Serve on a crisp plate or white ceramic bowl to highlight the jewel-tone green hues.
Garnish with thinly sliced radishes, crumbled feta, or fresh herbs like dill and parsley for an elevated experience. Drizzle an additional splash of high-quality olive oil just before serving for a glossy finish that invites the eye and palate.
| Nutrient | Per Serving |
|---|---|
| Calories | 80 |
| Protein | 2g |
| Carbohydrates | 8g |
| Fat | 5g |
For more vibrant vegetable tips and salad inspiration, be sure to explore our Ultimate Vegetable Prep Guide. Also, learn about the science behind blanching with expert insights from NSF International.

Q&A
Q&A: Bright and Crisp – How to Blanch Green Beans for Salad Bliss
Q1: What exactly is blanching, and why should I bother blanching green beans for my salad?
A1: Blanching is a quick dip in boiling water, followed by a cool plunge into ice water. Think of it as a spa treatment for green beans-it locks in their vibrant color, crisp texture, and fresh flavor, transforming them from just-okay to salad-showstopper!
Q2: How do I know when my green beans are perfectly blanched?
A2: Timing is everything! Usually, 2-3 minutes in boiling water does the trick. The beans should turn a dazzling emerald green and be tender yet still snap when bitten. Overcooking will lead to limp, dull beans-nobody wants that in a crisp salad.
Q3: Can I blanch green beans ahead of time, or is it best to do it right before serving?
A3: You can definitely blanch ahead! After shocking the beans in ice water, drain them well and store in an airtight container in the fridge for up to 2 days. Just give them a quick toss before mixing in your salad for that fresh crunch.
Q4: Is blanching only for green beans, or can it help other veggies too?
A4: Oh, blanching is a veggie’s best friend! It works wonders on asparagus, broccoli, peas-even carrots. The magic is the same: bright color, crisp texture, and that fresh-from-the-garden taste.
Q5: Any sneaky tips for blanching like a pro?
A5: Absolutely! Use plenty of salted boiling water to season beans evenly and keep a big bowl of ice water ready for the shocking plunge. Also, spread beans on a paper towel after draining to get rid of excess moisture-this helps your salad stay crisp, not soggy.
Q6: What if I don’t have an ice bath? Will cold water alone do the trick?
A6: Ice baths are ideal because they instantly halt cooking, but if you don’t have ice handy, super cold tap water can work in a pinch. Just keep the beans moving to cool them quickly and stop that cooking clock.
Q7: Can blanching green beans boost their nutritional value?
A7: Blanching gently preserves vitamins and reduces enzymes that can cause spoilage. While some nutrients may leach slightly into the water, blanching is overall better than overcooking or leaving beans raw, especially when it comes to digestibility and taste.
Q8: How does blanching green beans elevate the overall salad experience?
A8: It’s all about contrast-blanched green beans bring a satisfying crunch, a pop of vivid color, and a fresh, sweet flavor that plays beautifully with creamy dressings and tangy vinaigrettes. They turn a simple salad into a celebration of greens!
To Wrap It Up
In the art of crafting the perfect salad, blanching green beans stands as a simple yet transformative step-infusing each bite with a vibrant crunch and a burst of verdant freshness. Armed with this bright and crisp technique, your salads will leap from ordinary to extraordinary, inviting both the eyes and palate to celebrate nature’s greenest gifts. So next time you reach for those humble green beans, remember: a quick dip in boiling water followed by an icy plunge is all it takes to unlock salad bliss in every forkful. Happy blanching, and here’s to salads that sing with color and crunch!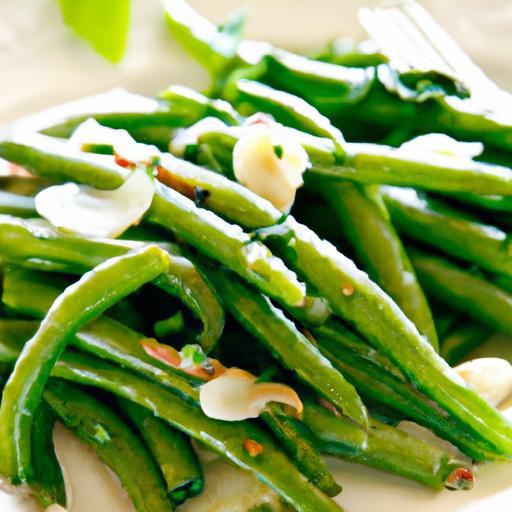


