There’s a certain enchantment in the glossy swirl of perfectly melted chocolate-rich, smooth, and ready to cloak anything from fresh strawberries to crunchy pretzels in its silky embrace. But mastering the art of melting chocolate is no mere kitchen sorcery; it’s a delicate dance of heat and timing, where a single misstep can turn velvety sweetness into a grainy mess. In this article, we unravel the secrets behind the best ways to melt chocolate for dipping, transforming a simple ingredient into a potion of irresistible indulgence. Whether you’re a seasoned chocolatier or an eager home cook, prepare to unlock the magic that turns melting chocolate into a sensory experience worth savoring.
Essential Techniques for Achieving Smooth, Luscious Melted Chocolate
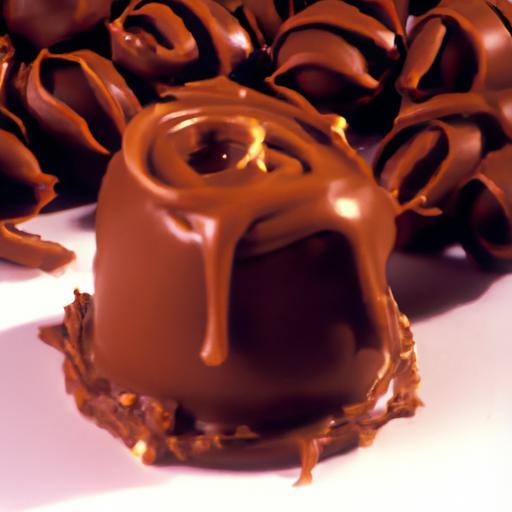
Mastering Chocolate Magic: Best Ways to Melt for Dipping begins with understanding the fundamentals that transform ordinary chocolate into a silky, glossy coating. Whether you’re preparing delicate truffles or dipping fresh strawberries, the secret lies in temperature control, proper chocolate selection, and mindful stirring. Starting with the right chocolate and melting it gently ensures your final result is velvety and irresistibly shiny, a true hallmark of professional confectionery.
Prep and Cook Time
Preparation: 10 minutes
Melting & Dipping: 15 minutes
Total: 25 minutes
Yield
Approximately 2 cups of melted chocolate, perfect for dipping 20-25 pieces (e.g., fruit, nuts, or pastries)
Difficulty Level
Medium – requires careful temperature control to avoid scorching or seizing
Ingredients
- 8 oz high-quality couverture chocolate (preferably 60-70% cocoa solids, finely chopped)
- 1 tbsp unsalted butter (optional, for extra shine and smoothness)
- 1 tsp vegetable oil (optional, to thin chocolate slightly for easier dipping)
- Flavor infusions (optional): ¼ tsp vanilla extract, zest of 1 orange, or a pinch of sea salt
Instructions
- Choose your melting method. The double boiler is the gold standard for gentle, even heating to prevent burning. Fill a pot with a few inches of water and bring to a simmer, ensuring the bowl rests above water level.
- Chop chocolate finely. Even-sized small pieces guarantee smooth melting and quicker tempering.
- Place chocolate in the heatproof bowl. Stir constantly with a silicone spatula. Chocolate should melt gradually – patience is key.
- Incorporate butter and oil. When ¾ melted, add butter and oil for glossy, fluid chocolate ideal for dipping. Stir until fully combined and smooth.
- Add flavor infusions. If desired, gently mix in vanilla, citrus zest, or salt now. These subtle accents personalize your coating to elevate each bite.
- Monitor temperature. Keep chocolate between 104°F and 113°F (40-45°C) for dark chocolate melting. Based on type, adjusting temperature avoids graininess or burning.
- Remove from heat. Once fully melted and glossy, remove bowl and keep chocolate warm over a thermo-safe surface or by maintaining a warm water bath.
- Prepare to dip. Using forks or dipping tools, immerse your treats cleanly, then gently tap to remove excess coating. Place on parchment to set at room temperature or chill.
Tips for Success
- Choose couverture chocolate. Its higher cocoa butter content ensures the smoothest melt and flawless shine, essential for dip perfection.
- Avoid moisture. Even a tiny drop of water causes chocolate to seize. Always keep utensils and workspace dry.
- Stir continuously. Constant movement prevents hot spots that can scorch or crystallize lumps.
- Use gentle heat. Direct microwaving risks overheating. If using a microwave, heat in 20-second bursts and stir thoroughly between intervals.
- Flavor infusion options: Try cardamom pods, chili flakes, or even a splash of espresso for daring variations that surprise and delight.
- Maintain temperature. If chocolate cools too much and thickens, briefly rewarm over the double boiler instead of microwaving.
Serving Suggestions
Present your dipped delights on rustic wooden boards or vibrant ceramic platters for inviting contrast. Garnish with a dusting of cocoa powder, toasted nuts, or edible gold leaf for an elevated touch. Pair with fresh raspberries, candied orange peel, or flaky sea salt sprinkles to awaken every bite.
| Nutrient | Amount per 2 tbsp (30g) |
|---|---|
| Calories | 150 kcal |
| Protein | 2g |
| Carbohydrates | 15g |
| Fat | 10g |
For a deeper dive into tempering chocolate perfectly, visit our complete tempering guide. For the science behind chocolate melting, the Science Daily article on chocolate crystallization offers fascinating insights.

Q&A
Q&A: Mastering Chocolate Magic – Best Ways to Melt for Dipping
Q1: Why is melting chocolate the first critical step in chocolate dipping?
A: Melting chocolate is like unlocking its true potential. When done correctly, it transforms solid cocoa into a silky, glossy coat that clings perfectly to your fruits, nuts, or pastries. This luscious texture and sheen not only enhance flavor but elevate your dipping game from amateur to artisan.
Q2: What’s the safest and most foolproof way to melt chocolate?
A: The classic double boiler method reigns supreme for safety and control. By gently warming chocolate over simmering water, you avoid the risk of scorching or seizing. It’s like a warm hug for your chocolate-slow, steady, and completely coaxing it to a smooth, velvety finish.
Q3: Can I melt chocolate in the microwave?
A: Absolutely! The microwave method is a quick wizard’s shortcut. Use short bursts of 20-30 seconds on medium power, stirring between intervals. Patience is key to prevent overheating. Think of it as a gentle spell that requires careful attention to avoid turning your magic potion grainy or burnt.
Q4: What kind of chocolate works best for melting and dipping?
A: Look for chocolate with a high cocoa butter content-couverture chocolates are ideal because they melt smoothly and set with a beautiful shine. Avoid low-quality chips packed with stabilizers unless your focus is convenience over finesse. Remember, better ingredients yield better magic!
Q5: How can I rescue chocolate that seizes during melting?
A: Seized chocolate looks like a granular mess, but don’t despair! Adding a teaspoon of warm milk, cream, or vegetable oil little by little can coax it back to smoothness. It’s like a quick spell of repair-sometimes even chocolate magic needs a little extra care.
Q6: Should I temper chocolate before dipping?
A: For professional-grade results, tempering is the secret incantation. Tempered chocolate sets hard, snaps crisp, and sports an irresistible sheen. However, if you’re after casual dipping fun, melting without tempering still works-just expect a softer finish.
Q7: Any tips for keeping melted chocolate luscious during the dipping process?
A: Keep your bowl warm by placing it over a warm water bath or covering it with a damp towel to prevent cooling and thickening. Stir frequently to maintain a consistent texture. Like a wizard guarding their spell, vigilance keeps your chocolate dipping smooth and magical.
Q8: What are some creative twists to elevate the dipping experience?
A: Experiment by infusing your chocolate with flavors like chili, cinnamon, or orange zest while melting. Sprinkle dipped treats with crushed nuts, sea salt, or edible glitter before the chocolate sets. These little enchantments add depth and delight to your chocolate creations.
With these melting methods mastered, your chocolate dipping will be nothing short of enchanting. Grab your dipping tools, summon your favorite chocolate, and let the magic begin!
The Way Forward
As you embark on your chocolate melting adventures, remember that patience and precision are your sweetest allies. Whether you choose the gentle embrace of a double boiler or the quick warmth of the microwave, mastering the melt transforms humble chocolate into a velvety canvas for your dipping delights. Armed with these tips and tricks, you’re ready to create luscious, glossy coatings that will elevate every bite. So go ahead-dip, drizzle, and delight in the magic that only perfectly melted chocolate can bring. Your culinary creations will never be the same again.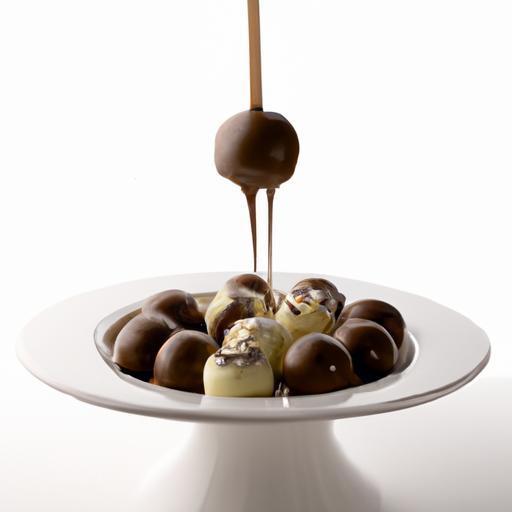


