Get ready to delight your taste buds and spook your guests with a treat that’s equal parts eerie and delicious: spooky eyeball cake pops! Perfect for Halloween parties, creepy celebrations, or just a fun kitchen adventure, these ghoulish goodies turn simple cake pops into eye-catching (literally!) works of edible art. In this tutorial, we’ll guide you step-by-step through creating these chilling confections, from shaping and decorating to tips for making them glow with creepy realism. Whether you’re a seasoned baker or a curious beginner, these spooky eyeball cake pops are sure to be a fang-tastic hit. Let’s dive into the creepy, cute, and utterly irresistible world of edible eyeballs!
Spooky Eyeball Cake Pops: A Creepy Treat Tutorial
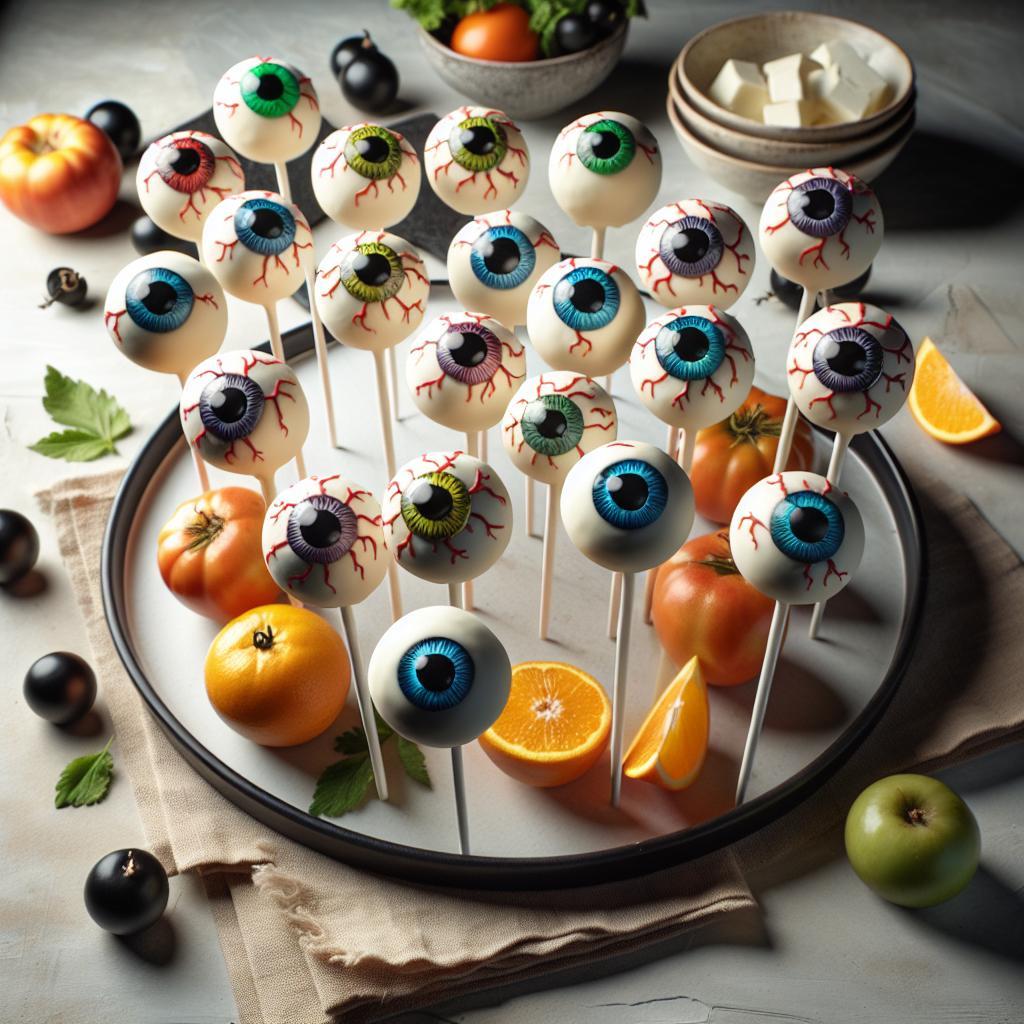
Spooky eyeball cake pops bring a striking combination of fun, fright, and flavor to your Halloween celebrations. These creepy confections are not only a treat for the taste buds but also a feast for the eyes, capturing the eerie essence of Halloween with their ghoulishly good appearance. Whether you are a seasoned baker or a curious beginner, crafting these chilling but charming cake pops promises an enjoyable adventure in creativity and taste.
Prep and Cook Time
Total Time: 2 hours (includes chilling time)
Yield
Makes approximately 24 spooky eyeball cake pops
Difficulty Level
Medium – Ideal for bakers comfortable with basic cake decorating techniques, but accessible for all skill levels with patience and care.
Ingredients
- 1 box vanilla cake mix (plus ingredients called for on the box, typically eggs, oil, and water)
- 1 cup buttercream frosting, room temperature
- 2 cups white candy melts
- 1 cup red candy melts
- 1/2 cup black candy melts or black gel icing
- Edible edible markers or gel food colors (various shades for detailed shading)
- 24 cake pop sticks
- Edible shimmer dust (optional, for an eerie glisten)
- Wax paper or parchment paper for drying
Instructions
- Bake the cake: Prepare the vanilla cake according to the package instructions. Once baked, let it cool completely on a wire rack.
- Crumble the cake: In a large bowl, crumble the cooled cake into fine crumbs. This will create the perfect base texture for your cake pops.
- Add frosting: Mix in 1 cup of buttercream frosting gradually, folding gently until the mixture holds together but is not overly wet-think moist cookie dough consistency.
- Form cake balls: Using a cookie scoop or your hands, roll the mixture into 1.5-inch balls. Place them on lined baking sheets and chill in the refrigerator for at least 30 minutes until firm.
- Prepare candy melts: Melt the white candy melts in a microwave-safe bowl using 30-second bursts, stirring between until smooth.
- Attach sticks: Dip the tip of each cake pop stick into the melted white candy, then insert it halfway into each chilled cake ball. This secures the stick firmly.
- Coat the cake pops: Dip each cake pop in the white candy melts, ensuring complete coverage. Gently tap off excess coating and place them upright on parchment paper to dry.
- Create the eerie red veins: Using red candy melts or red gel food coloring on a thin brush, paint thin, spidery bloodshot lines radiating from the center of each eyeball while the coating is still slightly tacky.
- Detail the iris and pupil: With black candy melts or edible markers, draw a dramatic pupil in the center of each eyeball. Add layers of shading with food colors to give depth and realism. Try blending blues or greens for the iris ring.
- Add finishing touches: Dust with edible shimmer to create a wet, glossy effect reminiscent of a real eye. Allow all decorations to dry completely.
Chef’s Notes
- Substitution Tip: Use cream cheese frosting for tangier flavor or vegan frostings to fit dietary preferences.
- Stabilizing: If your cake crumbs feel too dry, add more frosting, one tablespoon at a time, to improve binding.
- Storage: Store cake pops in an airtight container at room temperature for up to 3 days or refrigerate if your environment is warm.
- Make-ahead: Cake balls can be formed, inserted on sticks, and frozen overnight before coating. Thaw completely before dipping.
- Decoration Tip: Use fine-tipped edible markers for more precise pupil and iris work. For unexpected flair, try edible glitter or glow-in-the-dark decoration powders.
Serving Suggestions
Arrange your spooky eyeball cake pops standing tall in a black foam block hidden within a faux skull or cauldron centerpiece. Accentuate with Halloween-themed confetti, fake cobwebs, or miniature pumpkins for a chillingly beautiful display. For an interactive twist, present them nestled in “bloody” red velvet cupcake crumbs or alongside a frosted “potion” punch for guests to enjoy-perfect for haunting your Halloween party table.
| Nutritional Info (per pop) | Amount |
|---|---|
| Calories | 180 kcal |
| Protein | 2 g |
| Carbohydrates | 25 g |
| Fat | 8 g |
Explore more Halloween dessert ideas. Also, check out the detailed guide on Food Network’s tutorial for perfect cake pops for additional professional tips.

Q&A
Q&A: Spooky Eyeball Cake Pops – A Creepy Treat Tutorial
Q1: What makes eyeball cake pops the perfect spooky treat?
A1: Eyeball cake pops combine the playful charm of bite-sized desserts with a delightfully eerie twist. Their round shape mimics the eyeball perfectly, and with the right colors and details, they become creepy, fun edible decorations for any Halloween or spooky-themed party.
Q2: What ingredients do I need to create these spooky eyeball cake pops?
A2: You’ll need: crumbled cake (any flavor you prefer), frosting to bind the crumbs, white candy melts for the eyeball base, colored candy melts or edible paint for the iris and veins, lollipop sticks, and some creative flair!
Q3: How do I make sure the eyeballs look realistic and creepy?
A3: Start with perfectly round cake pop balls. After dipping them in white candy melts, add detail by piping or painting on veins with red icing or edible markers. For the iris, use a colored candy melt dot topped with an edible black pupil. Smudging and irregular lines will make the veins look more authentic and spidery.
Q4: Any tips for preventing the eyeball cake pops from melting or breaking?
A4: Keep the melted candy at a consistent temperature to avoid thick or too-thin coatings. Insert sticks firmly but gently, and chill the cake pops before dipping to help them hold together. After dipping, let them dry completely upright in a styrofoam block or a specially designed stand.
Q5: Can kids help make these spooky eyeball cake pops?
A5: Absolutely! Kids will love rolling the balls and decorating the “eyes.” Just be cautious with the hot melted candy – let adults handle that part. Decorating with edible markers or pre-made icing veins is a kid-safe and fun way to add creepy details.
Q6: How can I spice up the presentation of my spooky eyeball cake pops?
A6: Serve them sticking out of a “bloody” red velvet cake, or nestle them in a bowl of fake cobwebs. Use jars labeled “Eyeball Elixir” filled with bright-colored drinks as a backdrop. Glow-in-the-dark sticks or flickering LED candles nearby will add an extra eerie effect.
Q7: Can these eyeball cake pops be made ahead of time?
A7: Yes – once decorated and fully dried, store them in an airtight container in a cool, dry place. They’ll keep their shape and flavor for a few days, making them a great advance treat for those last-minute party setups.
Q8: Any ideas for customizing eyeball cake pops for other occasions?
A8: Definitely! Change up the colors for a fun twist – bright rainbow irises for a party, gold and black for a masquerade ball theme, or even glittery edible paint for a magical fantasy vibe. The eyeballs can also be adapted to look like alien or monster eyes with creative color and shape variations.
With these spooky eyeball cake pops, you’re not just serving dessert-you’re serving a creepy, creative experience guaranteed to haunt your guests’ taste buds in the best way!
Insights and Conclusions
Whether you’re a seasoned baker or a Halloween hobbyist, these spooky eyeball cake pops bring the perfect blend of creepy and cute to your festive treats table. With their eerie yet playful design, they’re sure to catch every guest’s eye-literally! So grab your mixing bowls, get creative with your color choices, and prepare to serve up some truly unforgettable bites of frightful fun. Remember, the best part of any creepy treat is sharing the thrill-and maybe a few shudders-with friends and family. Happy haunting, and may your cake pops be as spooky as they are scrumptious!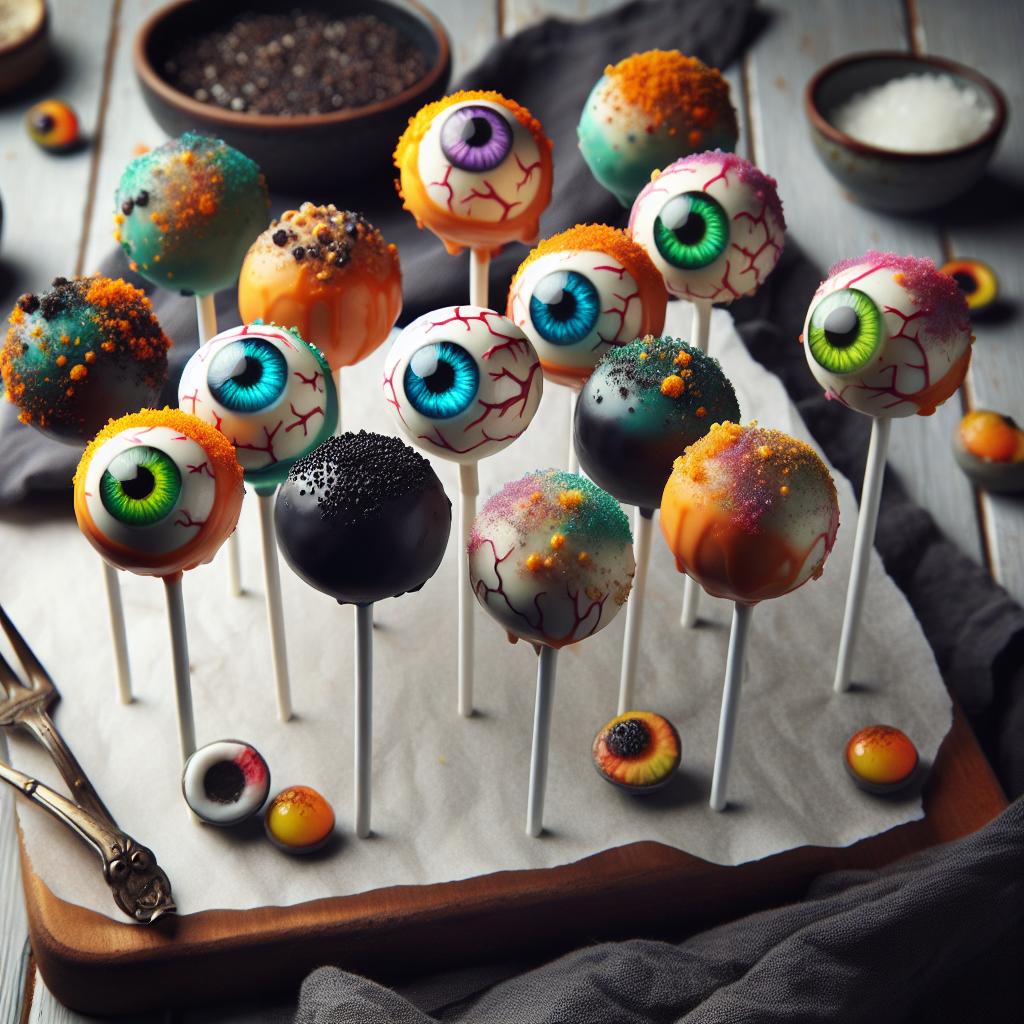


